I made these cute photo graduation party favors a couple of years ago for one of my bestest girlfriends' son who graduated from high school. They call this the "sour cream" container and I guess sour cream used to come in containers like this? Anyway, I've been getting emails on how I made these cute party favors so thought I would do a simple tutorial. FYI, there is a tutorial on splitcoast stampers, but they use cardstock. I first learned how to make this favor at a SU stamp camp (out of paper) and then again at Photocraft, a local craft store here, where Brian created a neat template to make this favor. He used a photo to make the favor which I thought was a really cool idea. I did buy the template, but after having to make so many, figured out that it was easier for me to not use the template. Here's my take on the easy peasy or quick & dirty tut...you will need a 4X6 photo, adhesive (something strong like scor-tape or sticky strip) and a paper crimper.
Step 1: start with a 4X6 photo and put adhesive on all edges on the back of the photo. Step 2: bring the two 4" edges together like this and adhere as shown. One edge will overlap so that it can stick to the other edge.
 Step 3: press down on the top of the favor so it will adhere on the top.
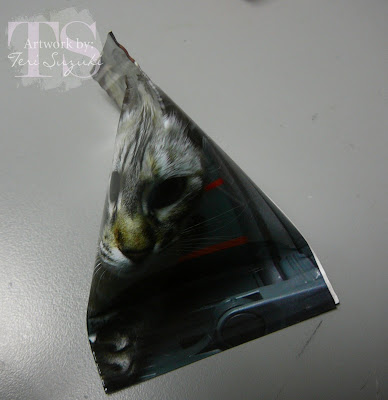
  It should now look like this:
 Another view of how it should look like. This would be the time that you add candy or whatever you are going to put inside of your favor.
 Step 4: now squeeze the photo as shown so it will adhere the opposite direction of the top.
Step 1: start with a 4X6 photo and put adhesive on all edges on the back of the photo.
 Step 2: bring the two 4" edges together like this and adhere as shown. One edge will overlap so that it can stick to the other edge.
 Step 3: press down on the top of the favor so it will adhere on the top.
  It should now look like this:
 Another view of how it should look like. This would be the time that you add candy or whatever you are going to put inside of your favor.
 Step 4: now squeeze the photo as shown so it will adhere the opposite direction of the top.


